Doorbell
With Unloc Doorbell, visitors scan a QR code next to the door to call who they want to visit. With the click of a button, the resident can open the door for the visitor.
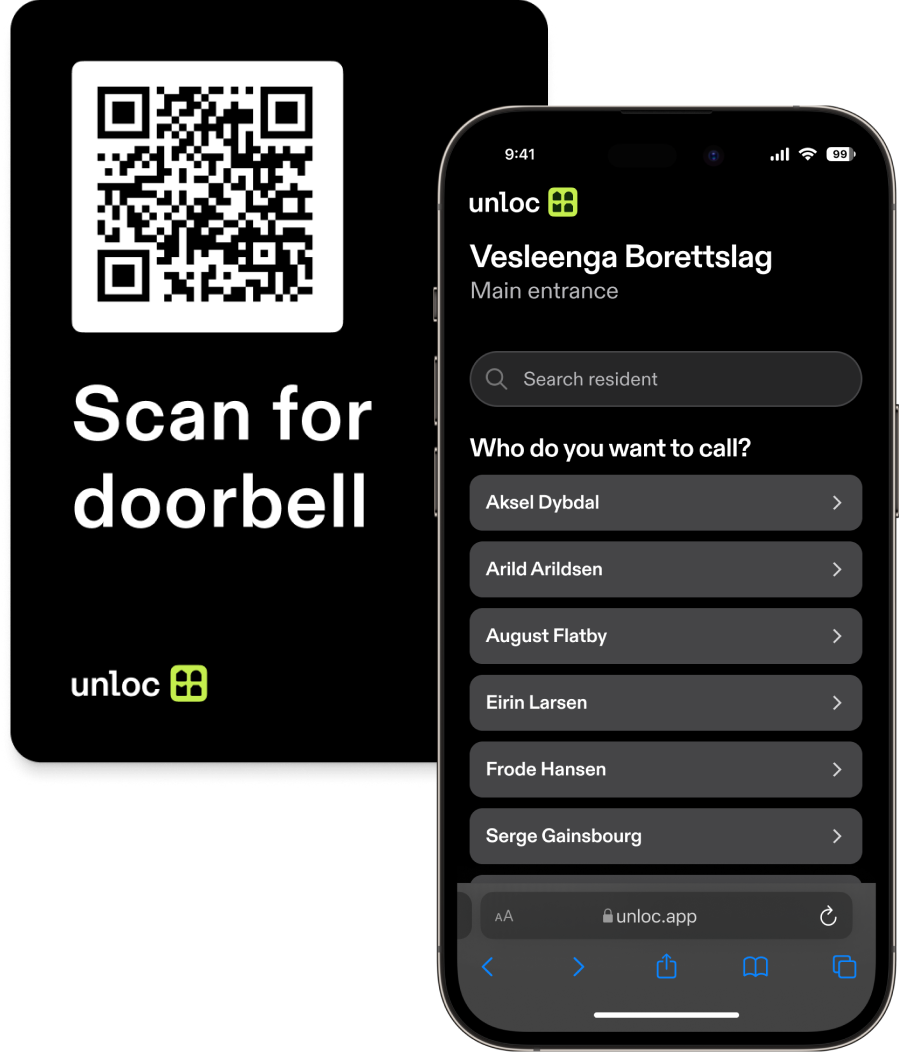
The Intercom works by setting up a Video Call between visitor and resident. The visitor calls from their browser, while the resident answers an opens the door through the Unloc app.
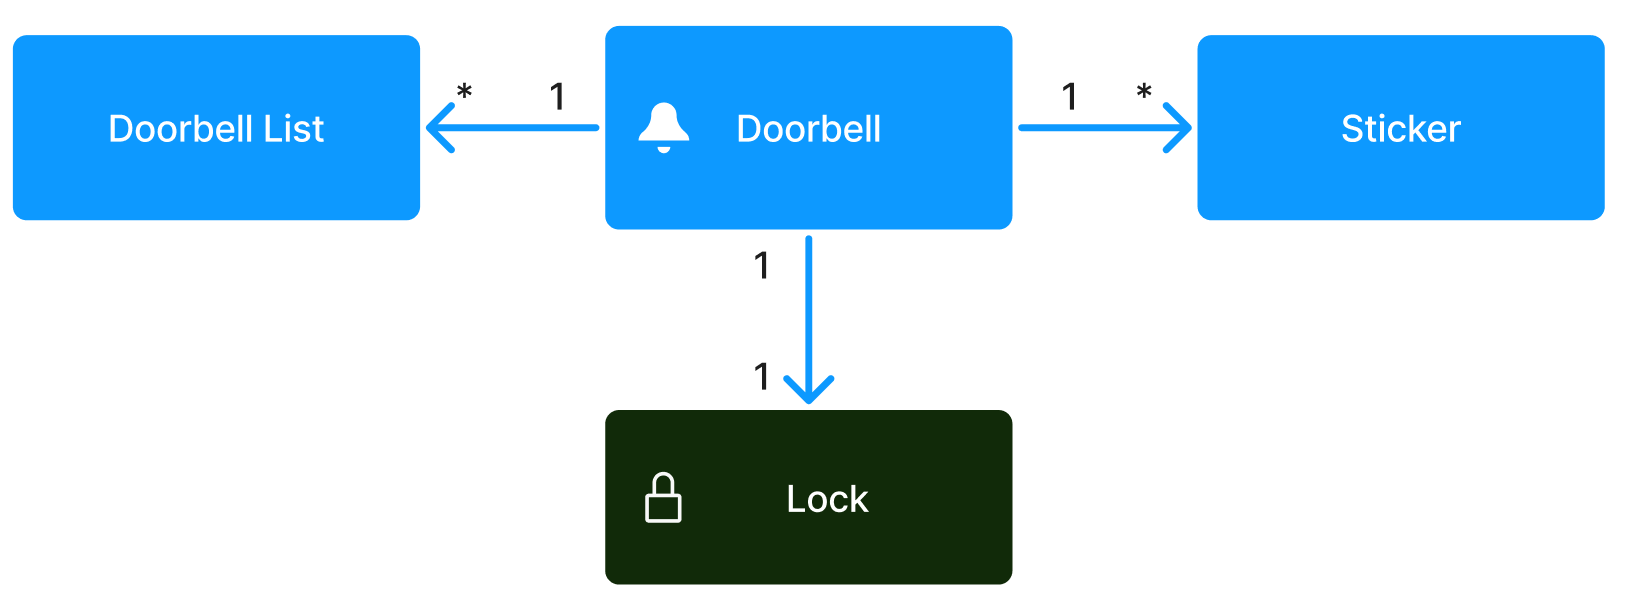
Data model
- A Doorbell is linked to one or more stickers.
- A Doorbell is linked to a Lock in your Project. When a call is accepted, the resident can open the Lock through the Unloc app.
- A Doorbell supports multiple user lists. Useful when you have multiple tenants in an office, for instance.
Learn how to get Unloc Doorbell on our web page.
Managing Doorbell through the API
With Version 2 of the Unloc API you can manage Doorbells and Doorbell lists directly through the API. Using the API requires that the Doorbell Project Module is activated for this Project.
Gotchas:
- Adding a user to a Doorbell that has not previously been added to the Project, will add that user as a Managed User as well.
- The name you give to a user in a Doorbell list can be different from the name given as Managed User in the same Project.
- A Doorbell entity is connected to a Lock. This Lock has to be an IP Lock (internet lock). This is because the user opening the door is most likely far away from he door inside their apartment, so bluetooth won't work.
Creating a Doorbell
We recommend creating the Doorbell in the Control Center, but you can create Doorbell through the API as well.
Use the Create Doorbell endpoint to add a Doorbell.
// POST /v2/projects/{projectId}/doorbells/
{
  "name": "Tertitten BRL",
  "lockId": "",
  "doorbellUserLists": [
    {
      "name": "Tertitten BRL",
      "doorbellUsers": [
        {
          "appUserId": userId, // Phone number of the user to add
          "name": "Shaka Hislop"
        },
        {
          "appUserId": userId2,
          "name": "David de Gea"
        },
        {
          "appUserId": userId2,
          "name": "Frode Grodås"
        }
      ]
    }
  ],
}
Note:
- The
nameof the Doorbell will be shown to visitors scanning the QR code. - The
lockIdis required to be for a IP Lock. - Add users as part of a DoorbellUserList. The
nameoff the list will currently not be shown anywhere, but might be in the future. - Only one DoorbellUserList is currently supported per Doorbell, so adding more will make the call fail with a 400 Bad Request.
Adding and removing users
Use the Update Doorbell User List endpoint to add or remove users from the Doorbell by phone number.
// POST /v2/projects/{projectId}/doorbells/{doorbellId}/user-list/{doorbellUserListId}
{
  "doorbellUsersToAdd": [
    {
      "appUserId": userId1, // Phone number of the user to add
      "name": "Bruce Wayne" // Name to appear in the list on the Doorbell
    },
  ],
  "doorbellAppUserIdsToRemove": [
    userId2 // Phone number of user to remove
  ],
}
Note: Adding a user to the Doorbell will create a corresponding Managed User in your Project, if that user does not exist already.
Updating the name of a user in a list
Use the Update Doorbell User List endpoint to update the name of a user on a Doorbell list.
// POST /v2/projects/{projectId}/doorbells/{doorbellId}/user-list/{doorbellUserListId}
{
  "doorbellUsersToUpdate": [
    {
      "doorbellUserId": userId1, // The ID referencing this user on this Doorbell
      "name": "Batman" // New name to appear in the list for this user on the Doorbell
    },
  ],
}
You find the doorbellUserId for a user through the Get Doorbell or Get All Doorbells endpoint.
Deleting a Doorbell
Use the Delete Doorbell endpoint to delete a Doorbell.
Doing this offboards the QR sticker
Updated 4 months ago